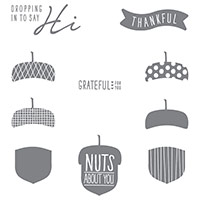
I am so excited to share this edition of the Stamp Review Crew with you because I adore this stamp set! It combines some of my favorite things in the world...the watercolor look, leaves, and all things fall.
If you are following along in order, you just came from
Linda Callahan's blog. She sure inspires me!
My first project is a little wall art/memory keeping. I think that my grandson provides some wonderful decor, lol! I picked up this frame at Walmart this summer intending to use it to make a butterfly-filled frame. But I think this is much better :) If you don't want to frame this, it would make an adorable scrapbook page also.
- I started with an 8"x10" piece of Kraft cardstock and started stamping at 2 corners.
- I added some fun speckles in Whisper White Craft ink and the Gorgeous Grunge set.
- Cut a 10" strip of ribbon and adhered with a little Tear & Tape on each end, folded over the edge.
- I picked a photo of my little grandson, Cameron, and printed it as a 4"x6" photo and matted with a 4½"x6½" white mat. Gold would look fantastic also, but it is hard to photograph.
- Place the photo where you like it best and tape it down with Washi tape at 2 corners.
I am always looking for fun, quick, and easy treat holders, especially as we get close to the Christmas season. This came together very quickly with very little math :)
- I took a 4¾"x8" piece cardstock, scored in half at 4".
- Then I a diagonal chunk off the part that would be the front. I wanted that chunk to be big enough that you could tell what is tucked inside.
- Then I stamped along the edge. Stitched on 2 sides.
- I had to use another fantastic fall set, Acorny Thank You, it just works so well with this set! I used the 2 sets to create the embellishment at the bottom.
- Then I cut a 3"x4½" piece of Very Vanilla and stamped that up to coordinate. This a place to put a note and maybe use Washi tape to adhere a gift card.
So, what do you think? Are you ready to start crafting yet? :)
That's all I have for you today, now it is time to go check out what
Heidi Bak's has in store for us!
Product List


